Japanese Milk Bread ・食パン・Shokupan
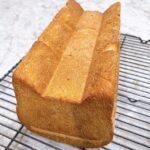
Japanese Milk Bread is called Shokupan in Japanese. You can find this fluffy, soft bread in Japan anywhere from convenience stores to fancy bakeries. Here in the U.S. though, you need to go to a Japanese grocery store or an Asian bakery to buy it. If you live near one, great! But if not, you can definitely make it at home!
I developed this recipe when I was living in a rural U.S. town and didn’t have any access to this kind of bread. After lots of experimentation, I’ve finally figured out a delicious recipe for Shokupan that reminds me of my home, Japan.
If you look at the recipe below, you’ll see that this recipe does not call for the famous Tangzhong (or Yudane) method. This Japanese Milk Bread is plenty fluffy and soft, but it has enough firmness to make good sandwiches. On the other hand, the Tangzhong method requires a roux mixture, and it makes the bread extra light which, in my opinion, is too fragile to make solid sandwiches.
That’s why I have two separate recipes for you! If you prefer the bread that is fluffy and soft with a little bit of firmness, keep on scrolling down.
If you prefer the softest bread ever, then check out the recipe with the Tangzhong method here:
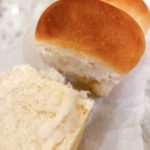
As you can see in the recipe, the ingredients needed for this bread are simple; you can find them at any grocery store. Here are some important tips for making this amazing bread!
4 Tips for Making Japanese Milk Bread
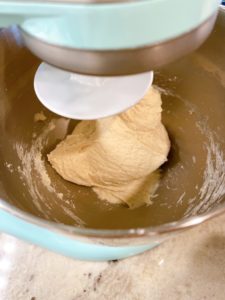
- Kneading: When you knead the dough, knead for 10 minutes! I use a stand mixer with a dough hook. At first I start the mixer at a slow speed so that flour doesn’t fly everywhere; this is when I start the 10-minute timer. Once the dough is roughly combined, turn up the speed to medium (4 for a KitchenAid stand mixer). It’s a wet dough, so I highly recommend using a stand mixer if you have access to one, but it’s definitely not impossible to knead by hand! Just use a little bit of flour on your surface.
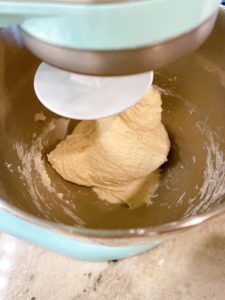
- Liquid: Milk is ideal for this recipe. However, if you are out of milk or don’t have enough, you can substitute this with water. You can still make a fluffy, soft bread! If you are using water instead of milk, I recommend you start with a 100 ml of water first and add more water in the dough as you need. The dough should be a little wet, which means it will stick to the bottom of the bowl; also the sides of the bowl will not be completely clean when the kneading is done (see picture above for reference). If the dough looks too dry, add a little bit more milk. If the dough looks a little too wet, add a bit more all purpose flour or bread flour.
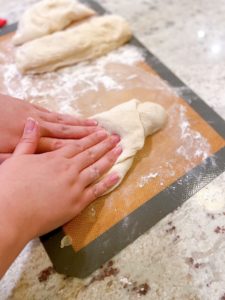
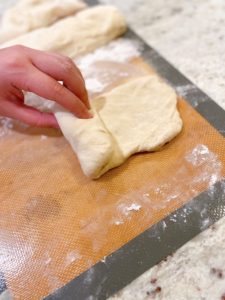
- Shaping: After splitting the dough into 3 roughly equal sizes, roll the pieces at least twice to shape them. Flatten, then roll as if you are making a cinnamon roll. Then flatten again, roll, flatten one more time, then roll one last time and place it in the tin.
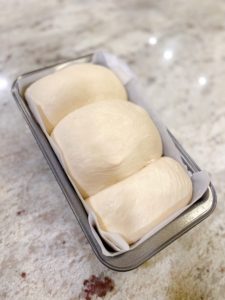
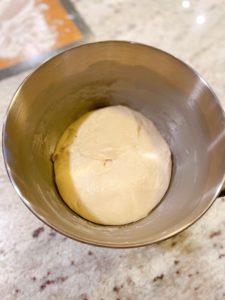
- Proofing: For the 1st proof, always let the dough rise until it has doubled in size. For the 2nd proof, wait until the dough has doubled in size or until the dough reaches a little over the top of the tin. Proofing time depends on how warm your home is. Sometimes it only takes 1 hour, other times it can take up to 4 hours for the dough to rise properly. I highly recommend starting the dough making process early in the day!
Japanese Milk Bread・食パン
Equipment
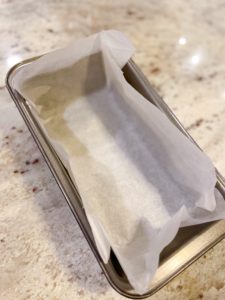
- 23cm x 13cm / 9in x 5in bread tin
Ingredients
- 200 g all purpose flour
- 100 g bread flour
- 45 g granulated sugar
- 5 g salt
- 5 g yeast
- 25 g butter cubed, room temperature
- 180-220 ml milk room temperature (adjust according to the dough wet/dryness)
Optional
- 1-2 tbsp milk for milk wash
Instructions
- Put all the ingredients in a stand mixer.
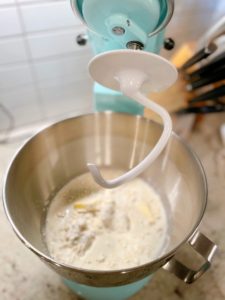
- Knead for about 10 minutes using a dough hook.
- Cover with plastic wrap and proof until it has doubled in size (about 1-2 hours, depending on how warm your kitchen is).
- While waiting for the dough to rise, line the bread tin with parchment paper.
- On a floured surface, split the risen dough into roughly 3 equal portions and shape into rolls, then place them in the bread tin.
- Cover with a damp cloth and proof again until the dough reaches a little over the top of the tin. (A clean shower cap works well too, but I don't recommend using plastic wrap because it will stick to the dough).

- Preheat oven to 350F / 180C
- Optional: For a shinier look, apply a milk wash on top right before putting the bread in the oven.
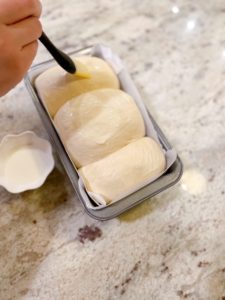
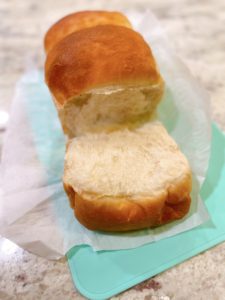
- Bake for 20 mins until the top is a dark golden brown.
Video
Notes


[…] an even bake (as in the Amazon listing). The loaf is going to be a little more dense than the usual Japanese Milk Bread with crunchy crust all […]